
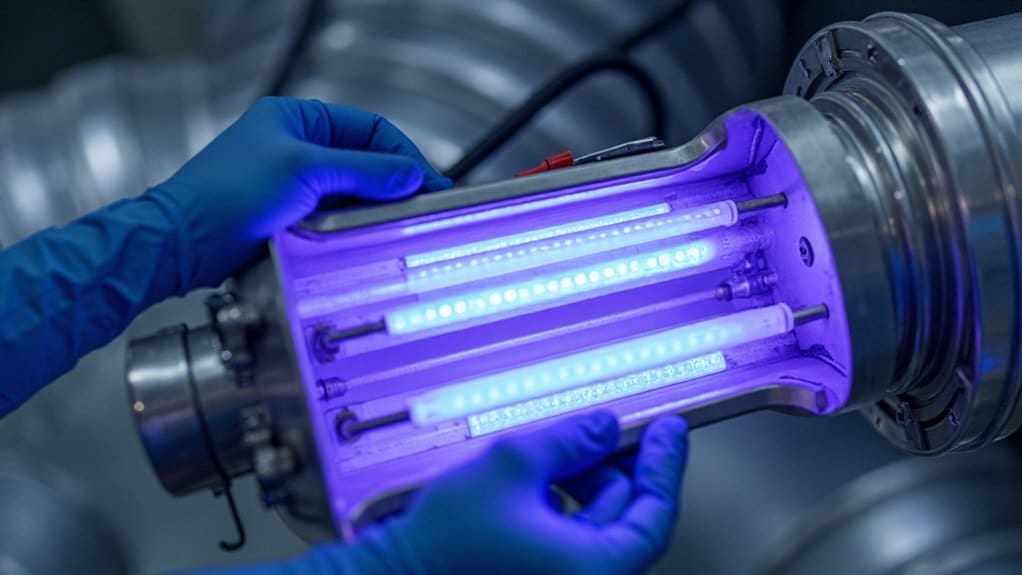
You’ll need professional installation for your UV light sanitizer to guarantee proper safety protocols and system compatibility. Replace UV bulbs every 9-12 months and clean surfaces every 6 months to maintain effectiveness. Always turn off power before maintenance and use gloves when handling bulbs to prevent surface contamination. Monthly cleaning of reflective surfaces and annual professional inspections will keep your system running at peak performance. Following these practices will maximize your investment’s air purification potential.
Key Takeaways
- Replace UV bulbs every 9-12 months and clean surfaces every 6 months to maintain optimal germicidal effectiveness.
- Always turn off power and wear protective equipment when handling UV bulbs to ensure safety during maintenance.
- Clean reflective surfaces monthly and inspect airflow patterns to prevent obstructions that reduce UV light penetration.
- Schedule annual professional inspections to verify proper system operation and maintain compatibility with HVAC equipment.
- Use clean gloves when replacing bulbs and avoid direct contact with lamp surfaces to preserve germicidal properties.
Understanding UV Light Sanitizers in HVAC Systems
While traditional HVAC filters capture airborne particles, UV lights take air purification a step further by actively destroying harmful microorganisms at the molecular level. These specialized UV lamps emit UV-C radiation that disrupts the DNA of bacteria, viruses, and mold, preventing their reproduction and eliminating health threats in your HVAC system.
You’ll typically find UV lights positioned near your evaporator coil, where they continuously sanitize the air flowing through your ductwork. This strategic placement keeps your coil clean and prevents microbial buildup that can compromise air quality and system performance.
Beyond improving indoor air quality, UV lights boost energy efficiency by maintaining cleaner system components. When mold and bacteria can’t accumulate on your evaporator coil, your HVAC system operates more effectively, potentially increasing efficiency by up to 25%. However, proper installation by a qualified HVAC technician and regular maintenance are essential for maximizing these sanitizing benefits.
Professional Installation Requirements and Safety Considerations
Although UV light sanitizers offer significant benefits for your HVAC system, their installation demands specialized expertise and strict safety protocols that only qualified professionals should handle.
You’ll need an experienced HVAC professional to guarantee proper installation, ideal placement, and correct configuration within your existing system. They’ll install essential safety switches and personal protective equipment protocols to prevent dangerous UV exposure during operation and maintenance.
Without professional expertise, you risk ozone production from inadequate installation, which can harm your family’s health. HVAC experts understand compatibility requirements between UV systems and your current equipment, ensuring maximum germicidal capabilities without compromising performance.
Your technician will establish regular maintenance schedules and demonstrate safe UV bulb replacement procedures. They’ll configure the system to operate effectively while meeting safety standards. Don’t attempt DIY installation – the risks of improper setup far outweigh any cost savings, potentially creating health hazards instead of the clean air benefits you’re seeking.
Essential Maintenance Schedule for UV Light Systems
Once your UV light system is professionally installed, maintaining its peak performance requires following a consistent maintenance schedule that protects both your investment and your family’s health.
Your HVAC system’s UV lights need regular attention to preserve their germicidal effectiveness and optimize indoor air quality. Following manufacturer instructions guarantees safe maintenance procedures.
- Every 6 months: Perform thorough cleaning of UV light surfaces to prevent dust buildup that reduces effectiveness
- Every 9-12 months: Schedule replacement of UV bulbs to maintain ideal germicidal power
- Before each maintenance task: Always turn off power and unplug the system for safety
- Annual professional consultation: Have an HVAC technician inspect your system and verify proper operation
Neglecting this maintenance schedule compromises your system’s disinfecting capabilities, reducing the benefits you’ve invested in. Regular cleaning and timely replacement keep your UV lights operating at peak efficiency, sustaining continuous protection for your family’s health.
Proper UV Bulb Replacement and Handling Procedures
Among all maintenance tasks, replacing UV bulbs demands the most careful attention to proper handling techniques. Your UV lights require bulb replacement every 9-12 months to maintain their germicidal effectiveness within your HVAC system.
Never touch the lamp surface directly during handling procedures, as fingerprints and oils significantly diminish UV output. This contamination reduces the disinfecting power of your entire system. Instead, use clean gloves or a lint-free cloth when installing new bulbs.
Regular cleaning every six months prevents dust buildup that compromises efficacy. Gently wipe the bulb surface with appropriate cleaning solutions to maintain optimal performance.
Proper maintenance extends beyond simple replacement. You’ll need to follow specific handling procedures to preserve the bulb’s germicidal properties. Consult HVAC professionals for guidance on correct installation techniques and safety protocols. Their expertise guarantees your UV light system operates at peak efficiency, providing maximum air purification benefits for your indoor environment.
Cleaning and Performance Optimization Techniques
While proper bulb replacement forms the foundation of UV system maintenance, systematic cleaning and performance enhancement guarantee your sanitizer operates at maximum germicidal capacity.
Regular cleaning keeps your system running smoothly and reduces maintenance costs. You’ll need to clean reflective surfaces monthly to maintain UV lights’ effectiveness. Dust and debris accumulation considerably reduces germicidal output, compromising your HVAC system’s efficiency.
Follow these optimization techniques:
- Clean reflectors and housing – Use isopropyl alcohol and lint-free cloths to remove buildup without scratching surfaces
- Inspect airflow patterns – Ensure proper air circulation around UV lights for ideal exposure time
- Monitor system performance – Track energy consumption and follow manufacturer guidelines for calibration
- Check HVAC components – Verify filters and ductwork don’t obstruct UV penetration
These practices keep your system operating efficiently while providing extended system life. Regular optimization will improve your HVAC system’s overall performance and maintain consistent sanitization effectiveness throughout your facility.
Troubleshooting Common UV Light System Issues
Even with diligent cleaning and optimization, you’ll occasionally encounter UV light system problems that require targeted troubleshooting approaches. When your UV lights start flickering or blinking, you’re likely dealing with power supply issues or need immediate bulb replacement. Monitor your system’s intensity regularly—diminishing UV output typically signals your bulb’s approaching its 9-12 month lifespan.
Don’t overlook dust accumulation on your lights, which drastically reduces effectiveness. Clean bulbs gently with soft cloths to restore excellent performance. If you notice persistent microbial growth in your HVAC system despite functioning UV lights, the problem often stems from improper placement or undersized units that can’t adequately sanitize your entire system.
These placement issues require professional assessment to cover critical areas completely. When troubleshooting efforts don’t resolve persistent problems, consult an HVAC professional for proper diagnosis and resolution to maintain your system’s sanitizing capabilities.
Frequently Asked Questions
Is It Worth Installing UV Light in HVAC?
You’ll benefit from UV light installation if you’re seeking air quality improvement, microbial growth reduction, and energy efficiency boost. It provides HVAC system disinfection, allergen mitigation, and mold prevention, especially in humid climates.
How Much Does It Cost to Install UV Light in Residential HVAC?
You’ll pay $400-$1,000 for residential HVAC UV light installation costs. Professional installation services add $200-$500 to the UV light’s $200-$500 price. HVAC system compatibility affects pricing, but you’ll gain significant HVAC air quality improvement benefits.
How Long Does UV Light in HVAC Last?
Surprisingly, your UV light bulb lifespan dramatically affects system performance! You’ll need replacement every 1-2 years despite continuous operation. Following UV light maintenance best practices and cleaning frequency guidelines guarantees maximum UV light effectiveness duration throughout operation.
How Often Should You Use UV Light Sanitizer?
You should run your UV light sanitizer continuously for ideal proper sanitizer usage. Follow the bulb replacement schedule every 12-24 months, perform regular sanitizer maintenance tasks, and monitor efficacy to guarantee effective disinfection coverage area throughout your home.
Conclusion
Your UV light sanitizer isn’t just another appliance—it’s your home’s microscopic warrior, battling invisible enemies 24/7. Without proper maintenance, you’re fundamentally sending a soldier into battle with a broken sword. Don’t let your investment become a glorified nightlight collecting dust in your ducts. Stay vigilant with replacements, cleanings, and inspections. Your family’s health depends on this silent guardian working at peak performance, turning your home into an impenetrable fortress against airborne threats.