
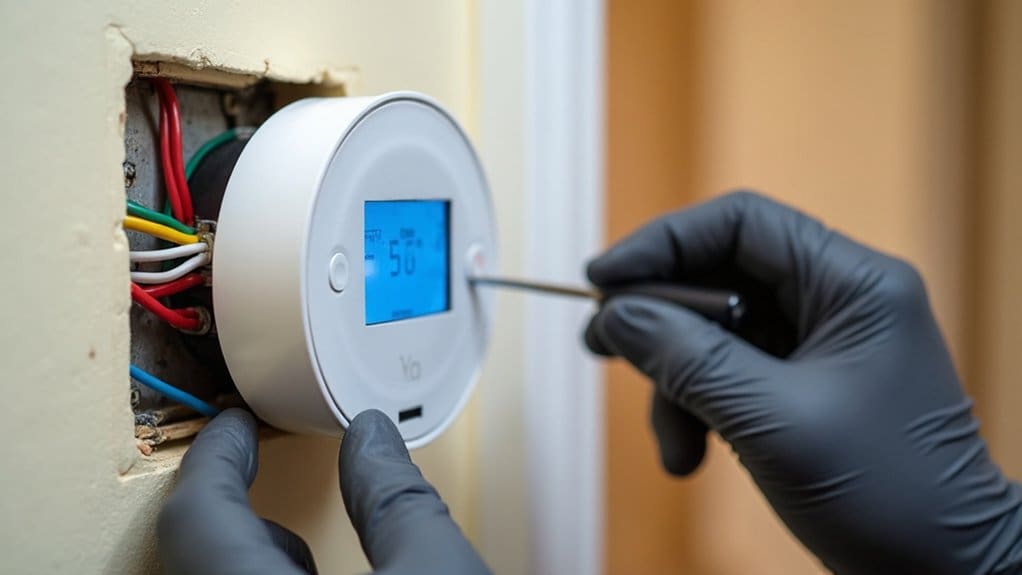
Installing a WiFi thermostat starts with turning off your HVAC system’s power and photographing existing wire connections. You’ll label each wire, remove the old unit, and mount your new smart thermostat according to the manufacturer’s wiring diagram. Connect it to your home’s WiFi network through the accompanying app, then configure schedules and temperature preferences. This upgrade can reduce your energy bills by 10-15% annually through intelligent automation and remote control capabilities that optimize your home’s climate efficiency.
Key Takeaways
- WiFi thermostats reduce annual energy bills by 10-15% through automated temperature adjustments and intelligent usage pattern analysis.
- Verify HVAC system compatibility and gather essential tools like screwdrivers, wire labels, and drill before starting installation.
- Power down HVAC system, photograph existing wiring, and label each wire before removing your old thermostat safely.
- Match wires to corresponding terminals using manufacturer’s diagram and install power adapter if C-wire is missing.
- Connect to home WiFi network and configure scheduling features through smartphone app to maximize energy savings potential.
Understanding WiFi Thermostats and Their Energy-Saving Benefits
While traditional thermostats only adjust temperature when you’re physically present, WiFi thermostats revolutionize home climate control by connecting to your wireless network and enabling remote operation through smartphone apps. These smart home devices offer advanced features that traditional models can’t match, including learning algorithms that adapt to your schedule and geofencing technology that automatically adjusts temperatures based on your location.
Smart thermostat brands like Nest, Ecobee, Honeywell Home, and Emerson Sensi provide intelligent control systems that maximize your home’s energy efficiency. You’ll benefit from substantial energy savings, with these devices reducing annual energy bills by 10-15% through automated temperature adjustments and usage pattern analysis.
The remote access capability means you can adjust your home’s climate from anywhere, ensuring ideal comfort while maximizing efficiency. By upgrading to a WiFi thermostat, you’re investing in both convenience and long-term cost reduction.
Pre-Installation Checklist: Tools, Compatibility, and Safety Requirements
Preparation makes the difference between a smooth WiFi thermostat installation and a frustrating experience filled with multiple trips to the hardware store. Before touching your existing thermostat, gather essential tools: screwdrivers, wire labels, a drill, and your smartphone for documentation.
Verify your HVAC system compatibility by checking system type, voltage requirements, and C-wire availability. Most new thermostat models require a C-wire for continuous power, so inspect your current wiring setup. Take photos of existing wire connections before removal – you’ll appreciate yourself later.
Check your home’s electrical specifications against the thermostat’s requirements. Different HVAC systems need specific compatibility features, and mismatched thermostats can damage equipment or create safety hazards.
Clean the wall surface after removing your old unit to guarantee proper mounting. If your system lacks a C-wire or has complex wiring, consider professional help. Energy savings aren’t worth risking your home’s safety or expensive HVAC repairs.
Removing Your Old Thermostat and Preparing the Installation Area
With your tools ready and compatibility confirmed, power down your HVAC system at the circuit breaker to guarantee electrical safety. Removing the Old Thermostat begins by carefully pulling off the thermostat face to expose the wired connections. Take a clear photo of the wire configuration before disconnecting anything. Label each wire with masking tape to match its terminal designation (R, W, Y, G, C).
Unscrew the wires from their terminals and gently pull them through the mounting plate. Remove the old mounting plate by unscrewing it from the wall. Clean the installation area thoroughly, removing dust and debris.
Examine your wire bundle for a common wire (C-wire), typically blue or black. If present, you’ll have consistent power for your WiFi thermostat. Check for any pilot holes that align with your new mounting bracket. Make sure the wall surface is level and smooth before mounting the new thermostat’s base plate using appropriate screws for your wall type.
Wiring and Mounting Your New WiFi Thermostat
Before installing your new thermostat’s mounting plate, double-check that you’ve identified the correct screw holes and make certain the plate sits flush against the wall. The smart thermostat installation process requires precise wire connections to control your HVAC system effectively.
Match each wire from your HVAC system to the corresponding terminal on your new thermostat. Most new thermostats use standard labeling: R for power, W for heating, Y for cooling, and G for fan. However, manufacturers compatibility varies, so consult your specific model’s wiring diagram.
Not all thermostats require identical wire configurations, and some systems aren’t compatible with every smart thermostat model. If you’re missing a C-wire for continuous power, you might need to install a power adapter kit.
Once wiring’s complete, carefully tuck excess wire into the wall opening and mount the thermostat base. When you install a smart thermostat, verify all connections are secure before attaching the display unit.
Connecting to WiFi and Configuring Your Smart Thermostat App
After securing your thermostat to the wall, you’ll need to establish a wireless connection to activate your device’s smart features. Connect your advanced smart thermostats to your home’s Wi-Fi network using the installation guide and accompanying app. Download the compatible smartphone app to gain remote access and control your homes heating and cooling systems from anywhere.
Follow the in-app setup instructions to configure schedules, temperature preferences, and geofencing features that optimize temperature control based on your daily routines. These settings help reduce energy consumption while maintaining comfort. Integrate your thermostat with voice assistants and other smart home devices for seamless automation throughout your homes.
Once configured, regularly review the app’s energy reports to analyze your heating and cooling patterns. Use this data to fine-tune your settings and maximize energy savings. The app provides valuable insights that help you make informed decisions about your home’s climate control efficiency.
Maximizing Energy Savings Through Optimal Programming and Settings
Why settle for basic temperature control when your smart thermostat can dramatically reduce your energy bills? You’ll maximize savings by programming temperatures 7-10 degrees back for 8 hours daily, cutting heating and cooling costs up to 10%. Heat pumps especially benefit from consistent scheduling rather than frequent manual overrides.
Your thermostat’s learning capabilities and remote access give you complete control over your home’s energy consumption. Use vacation settings during extended absences and access energy reports through your app to fine-tune performance. These features to enhance your home’s efficiency work best with gradual temperature adjustments rather than drastic changes.
Monitor usage data regularly to enhance your home’s comfort-efficiency balance. Advanced models track air quality alongside temperature, providing thorough environmental control. Stick to programmed schedules and avoid constant overrides—consistency is key to realizing your smart thermostat’s full money-saving potential while maintaining ideal comfort levels.
Frequently Asked Questions
Do I Need an Electrician to Install a Wireless Thermostat?
You don’t need an electrician for basic thermostat wiring requirements if you’re comfortable with DIY installation difficulty. However, complex HVAC compatibility considerations or missing C-wires require professional installation expertise for proper wireless setup process.
How to Connect Wi-Fi Thermostat?
You’ll start the setup process by downloading your thermostat’s app, then follow wireless connection tips for network pairing. Complete thermostat configuration through the app, ensuring compatibility requirements are met for smart home integration and remote control features.
How to Program a Thermostat to Save Energy?
Want to slash energy bills effortlessly? Schedule temperature changes by adjusting temperature settings 7-10 degrees during away hours. Monitor energy consumption, analyze energy trends, and reduce heating costs while minimizing cooling waste—you’ll save considerably.
How Much Does It Cost to Have a Wi-Fi Thermostat Installed?
You’ll pay $100-$300 for average installation costs with professional installation services. DIY installation considerations can save $50-$150, but expert installation recommendations suggest professionals for complex systems. Long term cost savings typically recoup your investment within two years.
Conclusion
You’ve successfully transformed your home into an energy-efficient haven with your new WiFi thermostat. Remember, Rome wasn’t built in a day—it’ll take a few weeks to fine-tune your settings and see maximum savings on your energy bills. You’re now equipped to monitor and control your home’s temperature from anywhere, reducing waste and costs. Keep experimenting with schedules and automation features to unleash your thermostat’s full money-saving potential.